Guide for the creation of a "furniture abacus" view to be included within an architectural project
Revit family
In this tutorial, we will continue to study the relationship between the parameters of the Revit family used as an example, the "Solo S62" chair and how they work within an architectural project.
Remember that the creation of BIM objects commonly called families in Revit is essential for the completion of 3D BIM models and their proper functioning.
The BIM Objects are commonly searched for on the Internet so that they can be included in a Revit design environment as Families without being modified in any way and will often ignore the fundamental characteristics, how they were made, with what parameters, what purposes they must fulfil, and what is the potential interaction with the 3D Model in construction.
Differently from what happens with a “.dwg” file in Autocad, or a “.ifc” file, a “.rfa” file (the Revit BIM Families are ".rfa" files, Revit BIM Projects are ".rvt" files), when a "BIM Family" object is inserted in a Design Parametric 3D Model, the latter is enriched with all the information contained in the inserted object that can, therefore, be interrogated, edited, accounted for, etc.
They are interior design objects such as Chairs, tables, armchairs, and sofas, or real architectural models like doors, windows, textures, and coatings, etc. and, therefore, we need to know their characteristics to exploit better the potential and integration with the main BIM model that hosts them.
In the previous tutorial we saw how, in addition to performing a graphic completion function, a Revit family contains a series of information and functions that allow it to interact with the 3D model of the project that is intended to host it, these parameters, which we have previously defined as the output performance of the Revit family, may be retrieved at any time and in a different manner depending on the design requirements and within a BIM 3D project.
In particular, we have obtained a “Furniture abacus" that can be inserted into a project table containing a lot of information on the furniture items included in the BIM model.
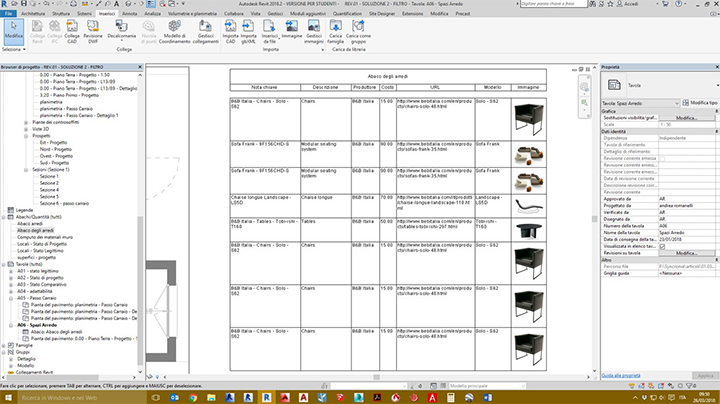
Revit - furniture abacus – adding it to the project table
Furniture abacus
Now we will discuss the relationship between the parameters that exist within Revit families, and their retrieval (field) inside the architectural project graphically represented by the abacus.
We need to remember that Revit abacuses work like masks that contain and retrieve within them the parameters not only of some parametric families imported into the project but of the entire BIM 3D model, and therefore it is possible to combine and graphically retrieve fields that put into related parameters belonging to different objects.
The most immediate example that can be made in this regard is the compilation of an abacus, which in addition to providing a list of furnishings found throughout the model, provides more accurate and up-to-date information of the architectural design environment in which each specific furniture element is inserted.
A classical breakdown of furniture per room.
To do this, we need to complete the furniture by downloading and putting into distinct rooms further Design objects such as:
- a bed; an armchair;
- a table;
- a chair; etc.
We place families, interior design elements, in the furniture project into distinct rooms such as the Living Room, Kitchen, and Bedroom, and give the BIM object a label by using the key note.
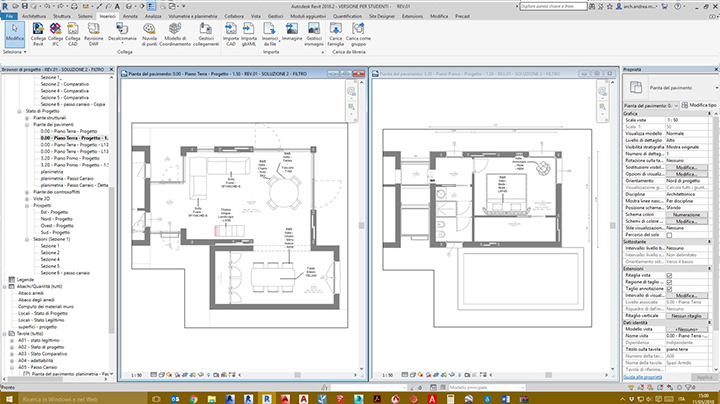
Furniture project – breakdown of rooms
As done previously, our furniture abacus is updated automatically.
We connect the new Interior Design Elements to their preview image by selecting the corresponding cell. The "Manage images" selector is displayed, select the image of the corresponding furniture and repeat the operation for any other new furnishing object present in the Architectural project.
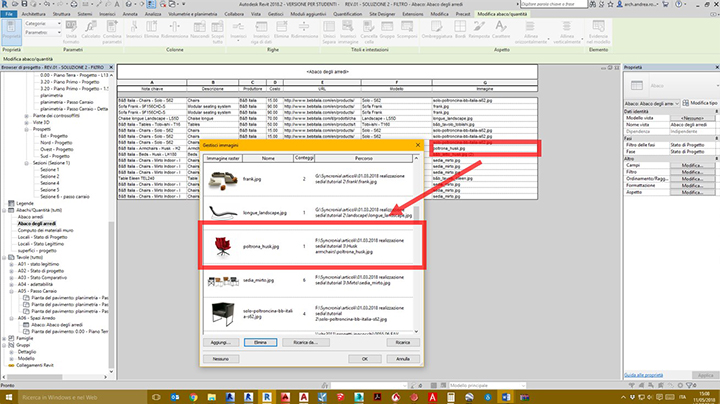
Furniture abacus - managing the preview image
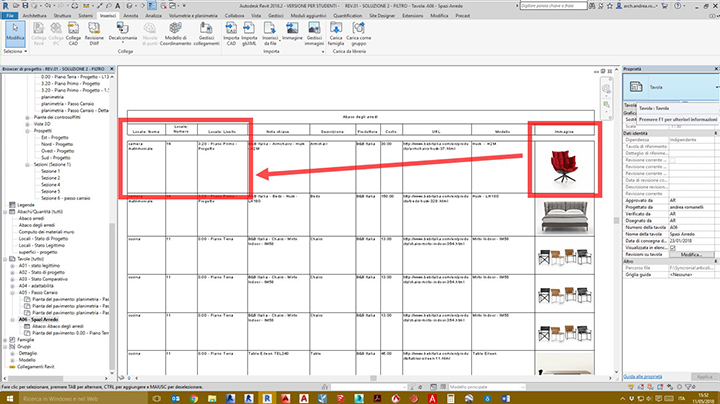
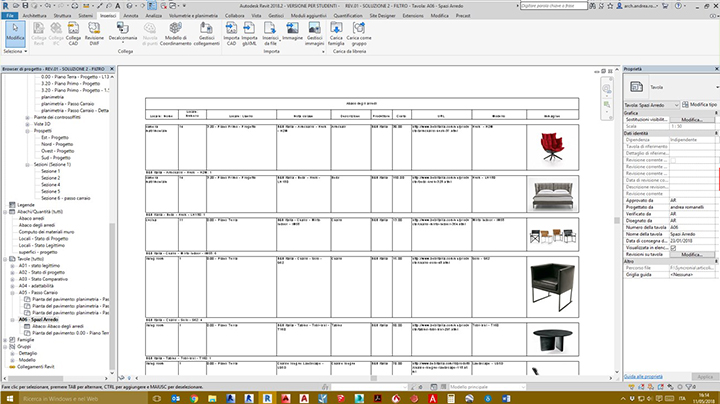
Returning to our project table, we will have a view of the updated abacus.
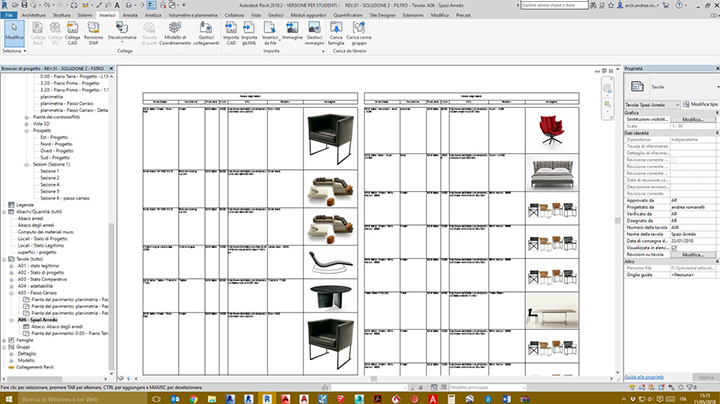
Furniture abacus - adding to project 1 table
Now, to group the furniture into rooms, different categories compared to those so far displayed need to be entered into the abacus using the same procedure.
Returning to the Abacus view of the furniture that can be selected in the project browsers, select "Fields" from the property bar of the screen and then select Room in the available fields of the property mask
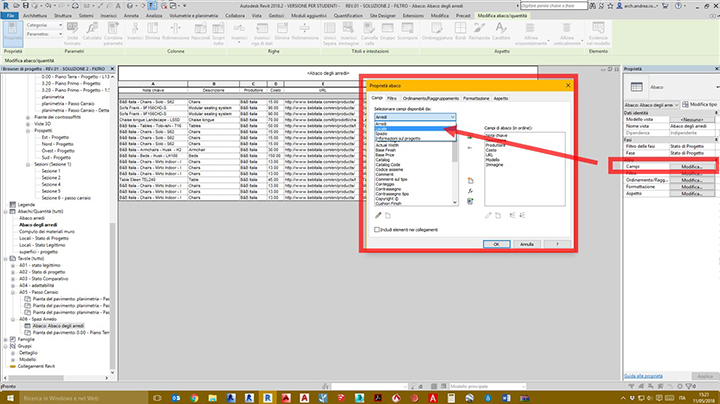
Furniture abacus - inserting Room fields
In this way, the fields are now selectable for the enrichment of our abacus furniture can be taken also from the Local category, this means that our new table will be composed by the fields that belong to the elements of the model different, but that interact between them.
Therefore, we can retrieve information from parameters of different elements into a single abacus.
Therefore, we add the following fields from the selector:
- Room: Name
- Room: Number
- Room: Floor
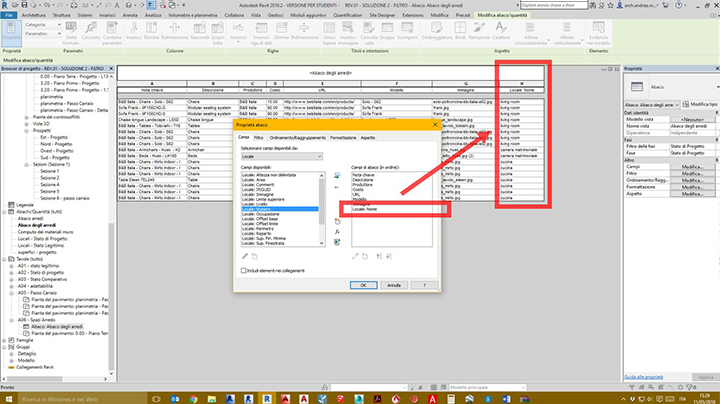
Furniture abacus - inserting Room 2 fields
We check the obtained result in the project table.
Furniture abacus - inserting Room 3 fields
As we can see each object contains, in addition to the information that retrieves the parameters inherent in the imported family, even where the same is located inside the project and, more precisely, the name and number of the room hosting the object and the building floor (level) where it is inserted.
In a similar way to what has been done up to now, you can insert additional fields and cross-reference to other parameters.
You can also intervene to sort/group the abacus to make it more readable, and, in particular, to eliminate the repetition of items.
From the properties menu of the “Furniture abacus" menu, sort by "key note" and uncheck the “List all instances”.
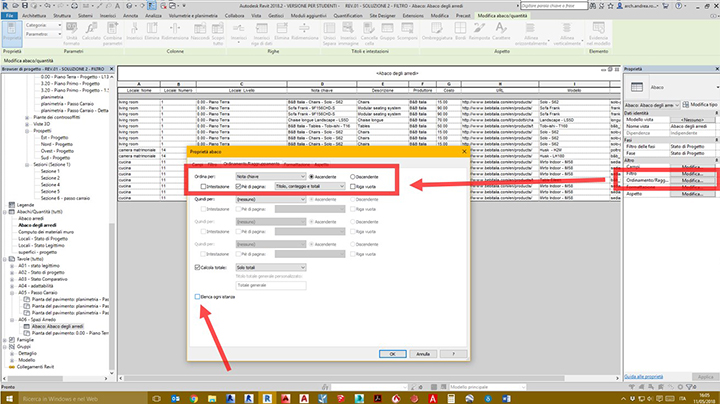
Furniture abacus - sorting/grouping
In this way, we obtain a cleaner table view without repetitions of images.
Furniture abacus - sorting/grouping 2
Shifting, filtering, or formatting repetitive or unnecessary fields can further refine the abacus.
For example, you can hide the key note field (column) since the same information is repeated and grouped together in the footer of each row, by selecting “Format” from the Properties menu of the Abacus and then approve the “Hidden field” for the “Key note”.
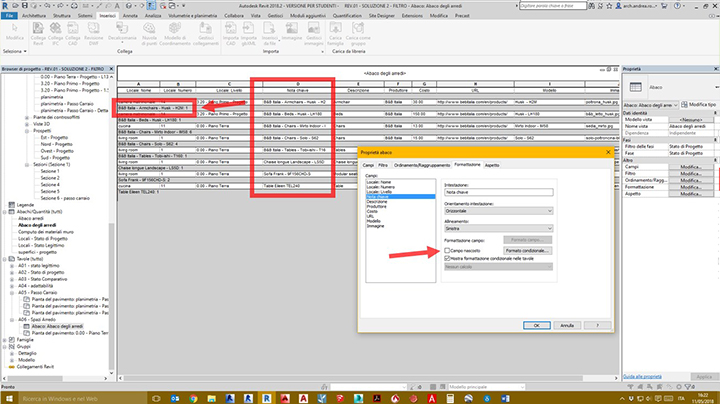
Furniture abacus - formatting
Now the furniture abacus has a clear and legible graphic look that is free of repetitive fields and with clear information.
We note that every element of the furniture is grouped, counted and added to the “key note" field.

Furniture abacus - sorting/grouping 3
In fact, the “Mirto Indoor – IM58” chair model is present for No. 6 units, all on the ground floor, and more precisely in the kitchen.
While the “Only – S62” chair is present for No. 4 units on the ground floor but inside the living room.
Now let's try and move some of these items on other floors or the rooms of the project to verify that the abacus works properly.
For example, we place two other Mirto chairs on the first floor and another Solo chair in the kitchen on the ground floor.

Furniture project – the breakdown of rooms 2
We verify to see if our Furniture Abacus has changed again n the project table.
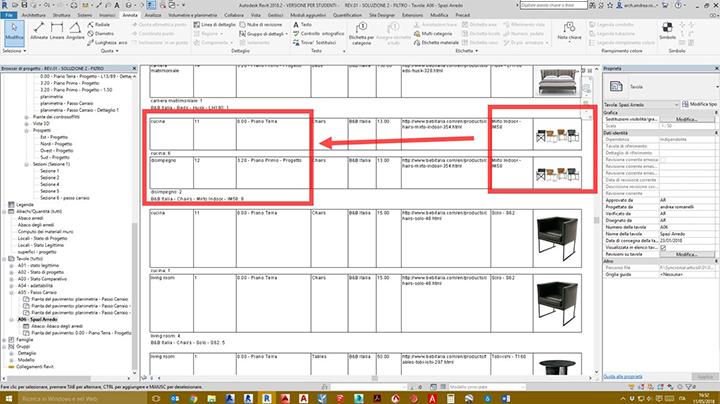
Furniture abacus - sorting/grouping 4
We now have a double row for the "Mirto indoor – M58" chair that is divided into the kitchen on the ground floor (No. 6 chairs) and hallway on the first floor (No. 2 chairs).
As for the “Only – S62” chair, we correctly have No. 1 unit in the kitchen and No. 4 units in the living room all on the ground floor.
We can say that the abacus is set up correctly and working.
In order to always have the cost of our furniture project under control, it is useful to add the sum of the costs of the individual items.
In the formatting field the calculation of the totals for each field can be easily applied; by applying to that of the costs we can see the price for the single item and the total estimate of our furnishing project at the same time.
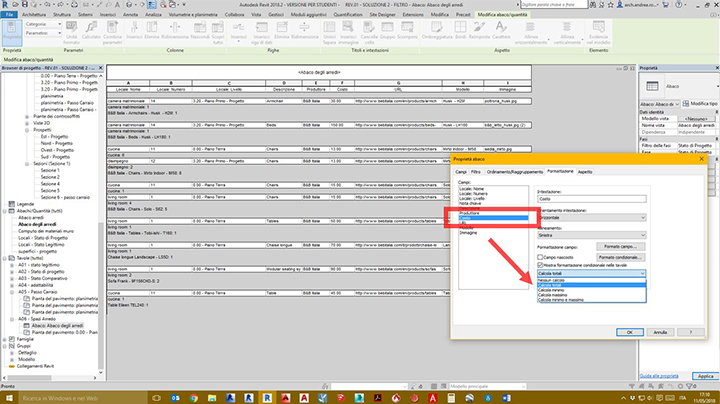
Furniture abacus – formatting 2
The changes made so far are just an example of how a Furniture abacus can be made. The result is only an example; there are many possibilities to combine the properties of the abacus to display the information according to the project needs.

Furniture abacus - adding to project 2 table
It is a good practice to generate an abacus that contains all fields needed to present your project, then to duplicate it into multiple views and to each of them apply the various display rules.