Un grande progetto di Rainbow per esaltare i valori del Made in Italy
in collaborazione con CILAB - POLITECNICO DI MILANO
Il design incontra il mondo della magia con le Winx: le fatine più trendy dell’universo, fiore all’occhiello di Rainbow e del Made in Italy, sbarcano alla Milano Design Week 2019 grazie al progetto “WINX LIFESTYLE MAGIC AND DESIGN”, frutto della prestigiosa collaborazione tra la global content company di Iginio Straffi e CILAB - Creative Industries Lab del Dipartimento di Design del Politecnico di Milano.
L’ambizioso progetto, che si colloca all’interno delle celebrazioni del 15esimo anniversario di Winx Club, ha coinvolto gli studenti che hanno analizzato le personalità, stile e i tratti distintivi di ognuna delle sei eroine, reinterpretandoli in veri e propri concept di lifestyle, innovativi e ricchi di magia.
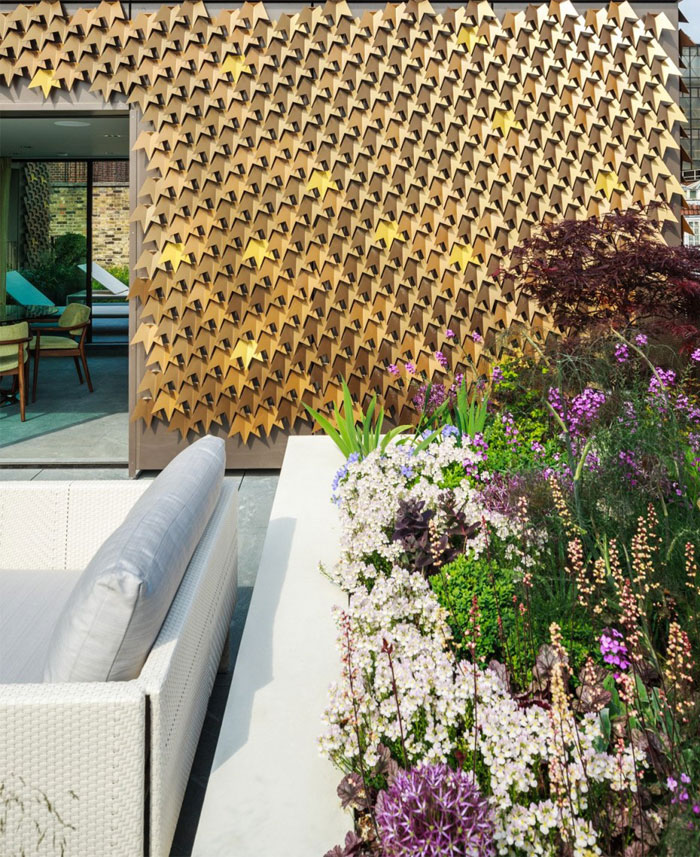
I sei progetti, presentati alla Design Week di Milano, sono veri e propri spazi espositivi emozionali ispirati al mondo delle fatine raccontati attraverso arredi, complementi e grafiche uniche che saranno in grado di far immergere il visitatore nell’universo Winx, un’icona classica dalle applicazioni potenzialmente infinite.
Al progetto hanno partecipato 60 studenti del Laboratorio di Sintesi Finale del corso di Laurea Triennale in Design del Prodotto Industriale che, supportati dai docenti, hanno sviluppato delle proposte secondo un brief definito da Rainbow e CILAB. Gli studenti con le migliori proposte sono stati poi affiancati da un panel selezionato di aziende italiane con cui hanno finalizzato i progetti e realizzato i prototipi tenendo in considerazione materiali, tecnologie e categorie merceologiche di ognuna. Lo stretto rapporto di collaborazione tra il CILAB e le aziende coinvolte (CMC2.0, Piva Group, WallPepper®, Mosaico Digitale, FCA SNC, LC Forniture Industriali, Grifal SpA, On light PF, Specchiopiuma, Kose & ISI Milano, EDG Enzo De Gasperi, TaborGlit), esponenti di punta nei loro settori di riferimento, ha permesso ai giovani progettisti di confrontarsi e maturare professionalmente in una attività di formazione sul campo unica nel suo genere, e ha consentito alle aziende di mettersi in gioco in un progetto innovativo nel quale valorizzare le proprie potenzialità.
L’evento di inaugurazione avrà luogo all’interno del campus Bovisa del Politecnico di Milano il 10 Aprile, e l’allestimento esposto sarà visitabile per tutta la durata della Milano Design Week 2019, dal 9 al 14 aprile. Parallelamente all’esposizione, Rainbow e CILAB coordineranno incontri, tavole rotonde, speech e altre iniziative con lo scopo di raccontare i valori di successo del Made in Italy delle aziende coinvolte.
Le Winx sono una realtà di portata mondiale costituita da traguardi tutti italiani. Bloom, Stella, Flora, Musa, Tecna e Aisha continuano ad essere fonte d’ispirazione di storie e prodotti sempre inediti, e “WINX LIFESTYLE MAGIC AND DESIGN” è il nuovo progetto che vede le nostre fatine protagoniste indiscusse di questo 2019.
CMC2.0, con i suoi sistemi costruttivi in cemento, a monoblocchi o a pareti, ma comunque su misura e idonei per essere collocati “ovunque nel paesaggio”, ha convinto le Winx: non hanno sentito il bisogno di ricorrere alla magia per la realizzazione delle proprie case!
Piva Group, grazie ai suoi serramenti ha reso i monoblocchi vetrine espositive permettendo ai visitatori di proiettarsi all’interno degli allestimenti e di goderne i dettagli.
WallPepper®, mettendo a disposizione le proprie carte da parati ha permesso ai designer di personalizzare interni ed esterni degli allestimenti e di sperimentare le capacità tecniche ed estetiche dei loro prodotti.
Mosaico Digitale®, attraverso l’uso di innovative tecnologie e materiali ha contribuito nel rendere magici e interattivi gli spazi, stimolando i giovani progettisti a reinterpretare il mosaico.
FCA SNC, mettendo a disposizione il proprio know how e le proprie tecnologie ha guidato i designer nella finalizzazione degli arredi in legno e nella loro prototipazione.
LC Forniture Industriali, grazie all’approfondita conoscenza dei materiali nel settore design, ha reso possibile la realizzazione di arredi, complementi, lampade e accessori in plexiglass, oltre che oggetti in spugna tecnica ad alta densità e pavimentazione a specchio in composito alluminio e pvc.
Grifal SpA, ha trasferito ai designer la propria vision di un nuovo cartone ondulato – a marchio cArtù – reinventato rispetto al suo classico utilizzo, portandoli a progettare librerie, sedute ed elementi di arredo inaspettati.
On Light PF, ha aiutato i designer nella realizzazione dell’illuminazione e degli effetti “magici” di luce all’interno degli spazi, mettendo a disposizione le loro più avanzate tecnologie.
Specchiopiuma, con i suoi sistemi flessibili e modulari per la realizzazione di superfici riflettenti ha potuto creare effetti ottici e di profondità negli spazi.
Kose & ISI Milano, hanno messo a disposizione le loro opere e i complementi di arredo in porcellana donando agli allestimenti l’aspetto di ambienti vivi.
EDG Enzo De Gasperi, con le sue decorazioni floreali ha permesso poi di aggiungere un tocco di natura e di realismo agli ambienti.
E infine TaborGlit, che con la sua materia prima rappresenta a pieno l’anima della serie animata fornendo un effetto magico e indistinguibile agli allestimenti.
Sito ufficiale: www.winxclub.com
Tendenze social: #WinxLifestyle #WinxClub #15YearsOfWinx
WINX CLUB IN NUMERI
6 Winx
15 anni di magiche emozioni
Oltre 100 Paesi raggiunti dalle Winx
8 Serie TV
4 Film TV
3 Film per il cinema
2 Serie animate Original Netflix
1 Serie live action Original Netflix in produzione
170 Canzoni dedicate
18 Trasformazioni
Oltre 100 cambi di abito
30 Nemici storici (tutti sconfitti)
4 Giorni di lavoro per 1 minuto di animazione
Oltre 6.000 minuti di animazione
Oltre 9.000.000 Frame
Infiniti Battiti di Ali
Rainbow
Il Gruppo Rainbow è stato fondato nel 1995 da Iginio Straffi, Presidente e Amministratore Delegato, e ha raggiunto la fama mondiale grazie allo straordinario successo delle fatine Winx. Il Gruppo è attivo nel segmento dell’intrattenimento per bambini e teenager ed è una delle principali realtà di riferimento a livello internazionale nella creazione e nello sviluppo di contenuti - sia animati sia live action - nella realizzazione di prodotti televisivi e cinematografici ad essi ispirati, nella loro successiva commercializzazione, anche tramite concessione di licenze, nonché nell’attività di produzione animata per società terze che è stata integrata nel 2015 con l’acquisizione della società canadese Bardel Entertainment Inc. Dal 2017 il Gruppo Rainbow, a seguito dell’acquisizione del Gruppo Iven, ha inoltre ampliato la propria offerta prodotti televisivi e cinematografici dedicata ad adulti e famiglie attiva sul mercato da oltre 30 anni. Nel corso di oltre 20 anni di storia il Gruppo ha creato e sviluppato diverse property e oggi può contare su un portfolio di prodotti trasmesso in oltre 100 Paesi, attraverso le diverse piattaforme di broadcasting. Rainbow è un fenomeno riconosciuto di licensing, ricopre la tredicesima posizione nella Top Global Licensor List con più di 500 licenziatari attivi su scala mondiale.
Comunicazione Rainbow
Daniele Mignardi Promopressagency
Rif. Nadia Rosciano - T +39 6 32651758 r.a.
[email protected] - www.danielemignardi.it
Facebook: Daniele Mignardi Promopressagency - Twitter: @DanieleMignardi
Ufficio Stampa Rainbow
Silvia Conti
T +39 07175067442
[email protected]